

In contrast to nondental professionals, you probably think a lot about how the teeth come together. Some focus on the precision of the cusp-to-fossa relationship, while others are content if their patients function well without pain. Millions of people have happy results across this spectrum of outcomes. Unlike dentists, most have little awareness of occlusion.
How the teeth touch tends to attract attention when something disrupts the system. Using an oral device to protect healthy breathing during sleep can be a disruptor. Human variation being what it is, some people can shift their jaw forward during sleep, and go right back to normal alignment in the morning. Others struggle to return to full-tooth-contact alignment. That’s why the AM Aligner, a morning repositioner, is one of the most important tools you can give your patients.
Most people, given simple range-of-motion exercises and a custom guide, can easily live with both jaw positions without too much trouble. Using a morning repositioner tool, such as the AM Aligner, allows patients to do so.
Is Tooth Movement Preventable?
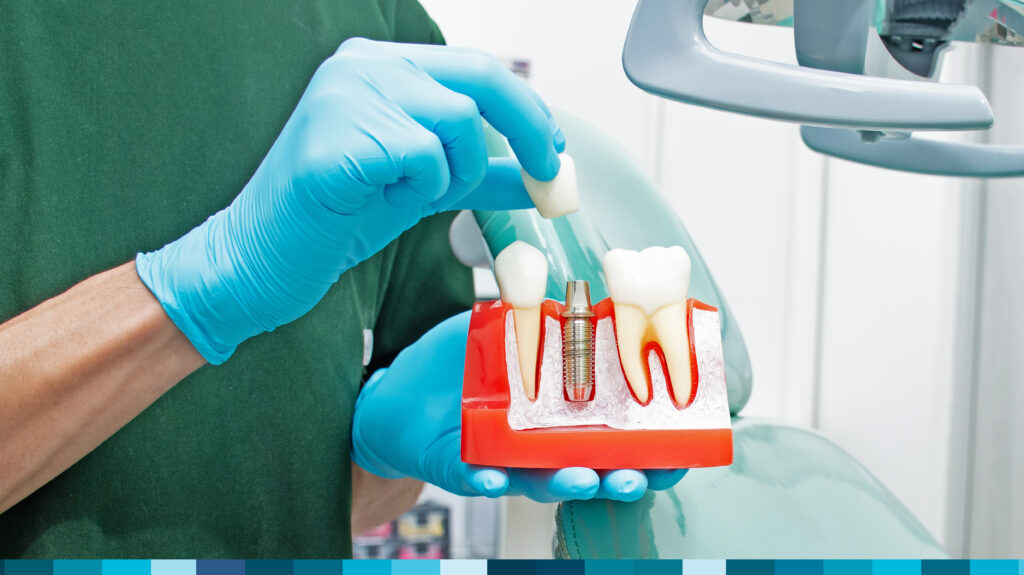
Think about how you assess tooth contact — what is it about human anatomy that allows us to use the mandible in all the ways we do? With changes to tooth contact — a known risk of nightguards or oral appliance therapy — do you record which teeth mark occlusal tape, hold shim stock, or register contact in a digital system like T-Scan™? Basically, what is your patient’s “before” bite? What can cause changes to that occlusion? Tooth movement can.
In the early days of oral appliance therapy, the materials and designs were known to allow or create tooth movement just like clear aligners do today. With increasingly precise fit as materials and designs have improved, tooth movement has become a much less common outcome.
Changes in the temporomandibular (TM) joint complex can reposition the mandible. Dentists see this as a shift — usually forward, but every direction is possible — when anterior repositioning devices are removed following seven or eight hours of use. The TM joint’s complex anatomy and 3D range of motion provide possibilities as to why the condyle sometimes does not return to pretreatment alignment. Keep in mind that there have been no detailed studies documenting exactly which component of the joint is responsible — it’s likely a combination that is unique to every individual and each TM joint. Muscles can shorten, ligaments can stretch, the disk can move in or out of place, and even the condyles and fossae can change shape. While a detailed history and exam can provide risk guidance, there is no way to fully predict what will happen when the jaw is held forward during sleep. Both dentist and patient benefit from the informed consent process.

Reducing the Risk of Bite Changes
How can the dentist lower the risk for bite changes? If the patient can demonstrate that the “before” bite can be achieved during wakefulness and with comfort, problem solved. Custom guides for this reset activity can be purchased as precision-made accessories from the oral device manufacturer, or made by you and the patient right there in your office when you deliver the patient-specific device.
Using the AM Aligner — made with ThermAcryl®, a plant-based material — is the easiest way to guide your patient to their original bite. The preformed wafers soften in warm water. The patient is instructed to bite into their normal bite after the arch is placed over the teeth. Some patients need coaching to bite their back teeth into alignment — the goal is to use the rapidly cooling, nonsticky ThermAcryl material to record the “before” bite — the target of recovery. If the position is missed, the wafer can be reheated for another try. Warming, fitting, cooling and verifying an AM Aligner takes less than three minutes — and all dreamTAP™ and TAP® 3 TL oral devices from New West come with an AM Aligner in the box. The process engages the patient and gives plenty of opportunity for the dentist to reinforce daily use of this simple guide.
After removal of the oral device in the morning, patients move their jaw during toothbrushing and other morning routines. Gentle massage of the closing muscles helps. When ready, the AM Aligner is placed, and the patient closes gently on the wafer — the imprints of the cusps guide the alignment of the condyles as they repeatedly squeeze on it for four-second intervals. An emphasis on gentle pressure is important. Typically, people report that by the time they are dressed and ready to face the day, their bite feels normal.
Each follow-up visit during oral device therapy should include questions about AM Aligner use and an assessment of bite changes. Autonomy means the patient has the choice whether or not to use the AM Aligner as directed. When people returning to the dental office with a shifted mandible and bite changes have been asked about AM Aligner use, many have said they didn’t feel it was necessary. The next step is to ask about complications due to these changes. Most patients will be surprised to learn there have been bite changes and will have no symptoms to report. They typically will want to talk to you about how great they feel with an open airway — and they also may tell their friends and family. They don’t think about their tooth contacts.
How to Prep and Use the AM Aligner
Fabricating the AM Aligner chairside is a simple process.
Step 1: Preparation

- Remove the AM Aligner from the package. Place in not-quite-boiling water for about one minute.
-
- Note: The ThermAcryl® Plus material becomes soft and pliable in water heated to about 160 degrees Fahrenheit.
- While the aligner is in the water, have the patient practice closing in their usual bite position. It is important that the patient return to this position every morning so that occlusion doesn’t change.
Step 2: Forming on Upper Arch
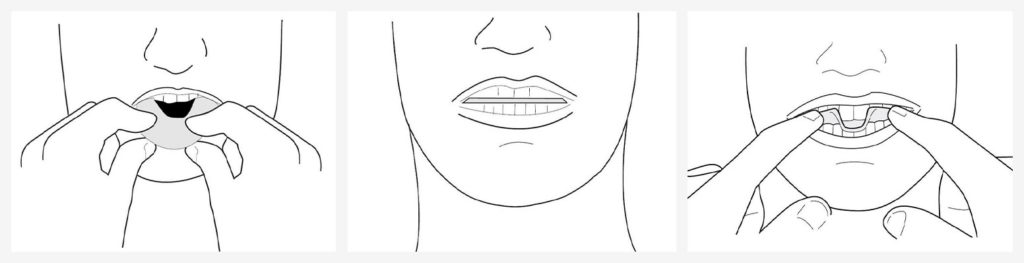
- Place the softened aligner over the upper teeth. The wafer should be centered on the incisor edge.
- Have the patient bite hard into their usual bite position.
- The patient should try to bite all the way through the aligner. (When held to the light, the material should be very thin and almost translucent where the tooth indentations are.)
- Mold the excess plastic over the upper teeth beginning in the middle and working your way backward.
- Using your thumb, create a slight dip in the middle so that the aligner dips down over the bottom front teeth.
- Continue molding to the sides.
- Have the patient mold the palatal flange against the roof of the mouth, not the lingual surfaces of the upper teeth. Have the patient close their lips and suck on the material to create a good fit around the teeth.
Step 3: Completing the AM Aligner
- Once the AM Aligner is properly fit, let it set in the mouth for two to five minutes.
- Carefully loosen the plastic from the back teeth first; then, remove the aligner from the mouth.
- Place the wafer under cool water for about one minute to fully set the material.
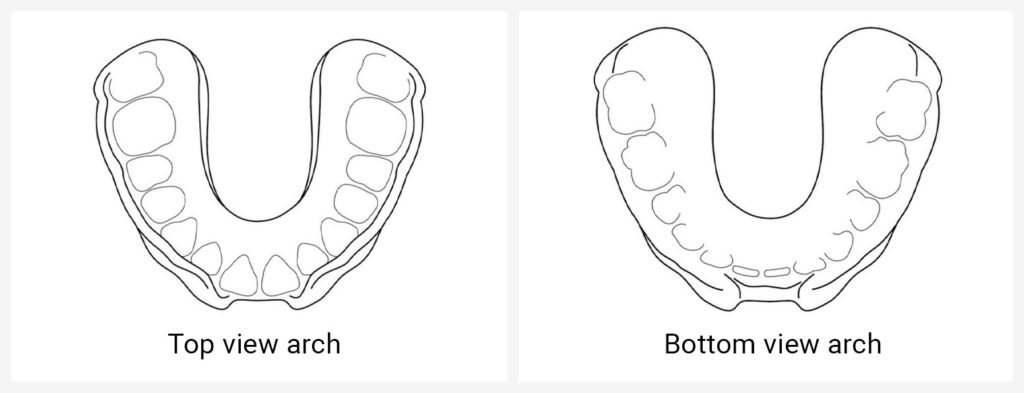
- The aligner should have a good shape of the upper arch with deep indentations of the lower arch on the bottom of the tray.
-
- Note: Hold the AM Aligner to the light. You should be able to see light through the bite impressions in the tray. If not, follow instructions above to refit and bite harder into the wafer.
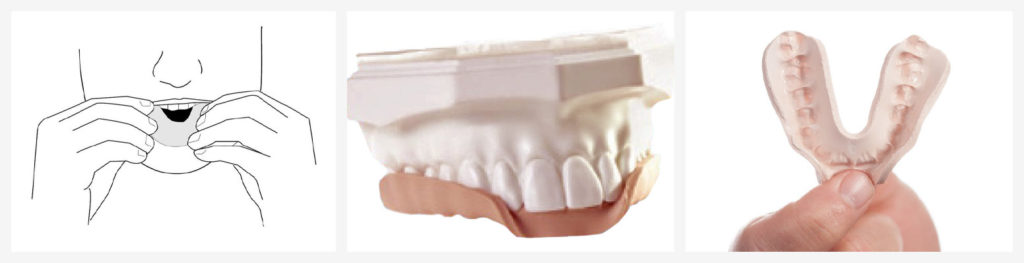
- Put the AM Aligner back into the mouth and check for fit. Repeat as needed.
Step 4: Daily Use
- After removing the treatment appliance in the morning, waiting several — up to 30 — minutes before using the AM Aligner allows the muscles and joints to be ready.
- When the patient is ready to use the AM Aligner, insert the aligner over the upper teeth. Pull the lower jaw back to engage the lower teeth into the indentations on the bottom of the tray.
- Once the lower jaw is in the correct position, squeeze or bite on the tray as if to put the back teeth together.
- Repeat the process of squeezing the jaw together into the AM Aligner until the usual bite position is achieved. This may take anywhere from five to 10 minutes.
- If it takes longer than 10 minutes, take a hot shower or place a warm pack on the joints to warm up the jaw joints and accomplish this process faster.
- Note: Instruct the patient to contact you if these methods are not successful.
- To remove the AM Aligner, take the tray off the back teeth first and then remove it from the mouth.
Conclusion
Dentists are uniquely positioned to treat patients for their snoring and obstructive sleep apnea with mandibular advancement devices (MADs). But with this comes known side effects (e.g., tooth movement and bite change) that many patients don’t consider when they begin treatment. The primary tool (MAD) keeps patients alive and healthy. The secondary tool (AM Aligner) prevents the primary tool from misaligning their bite.
To learn more about sleep therapy, or to explore the New West family of sleep appliances, click here.